Amazon Banner

Friday, April 25, 2014

Put your heart into it Free Kitchen Scrubbie

In case you have not caught on, I am a fan of really useful crochet.

Would you like to add this gem to your arsonal?  We can get started now.
For this project, you will need

N Crochet Hook (For body of Heart)
H Crochet Hook (For surface crochet of Netting)
Worsted Weight Cotton Yarn, 3 strands, in any color you like
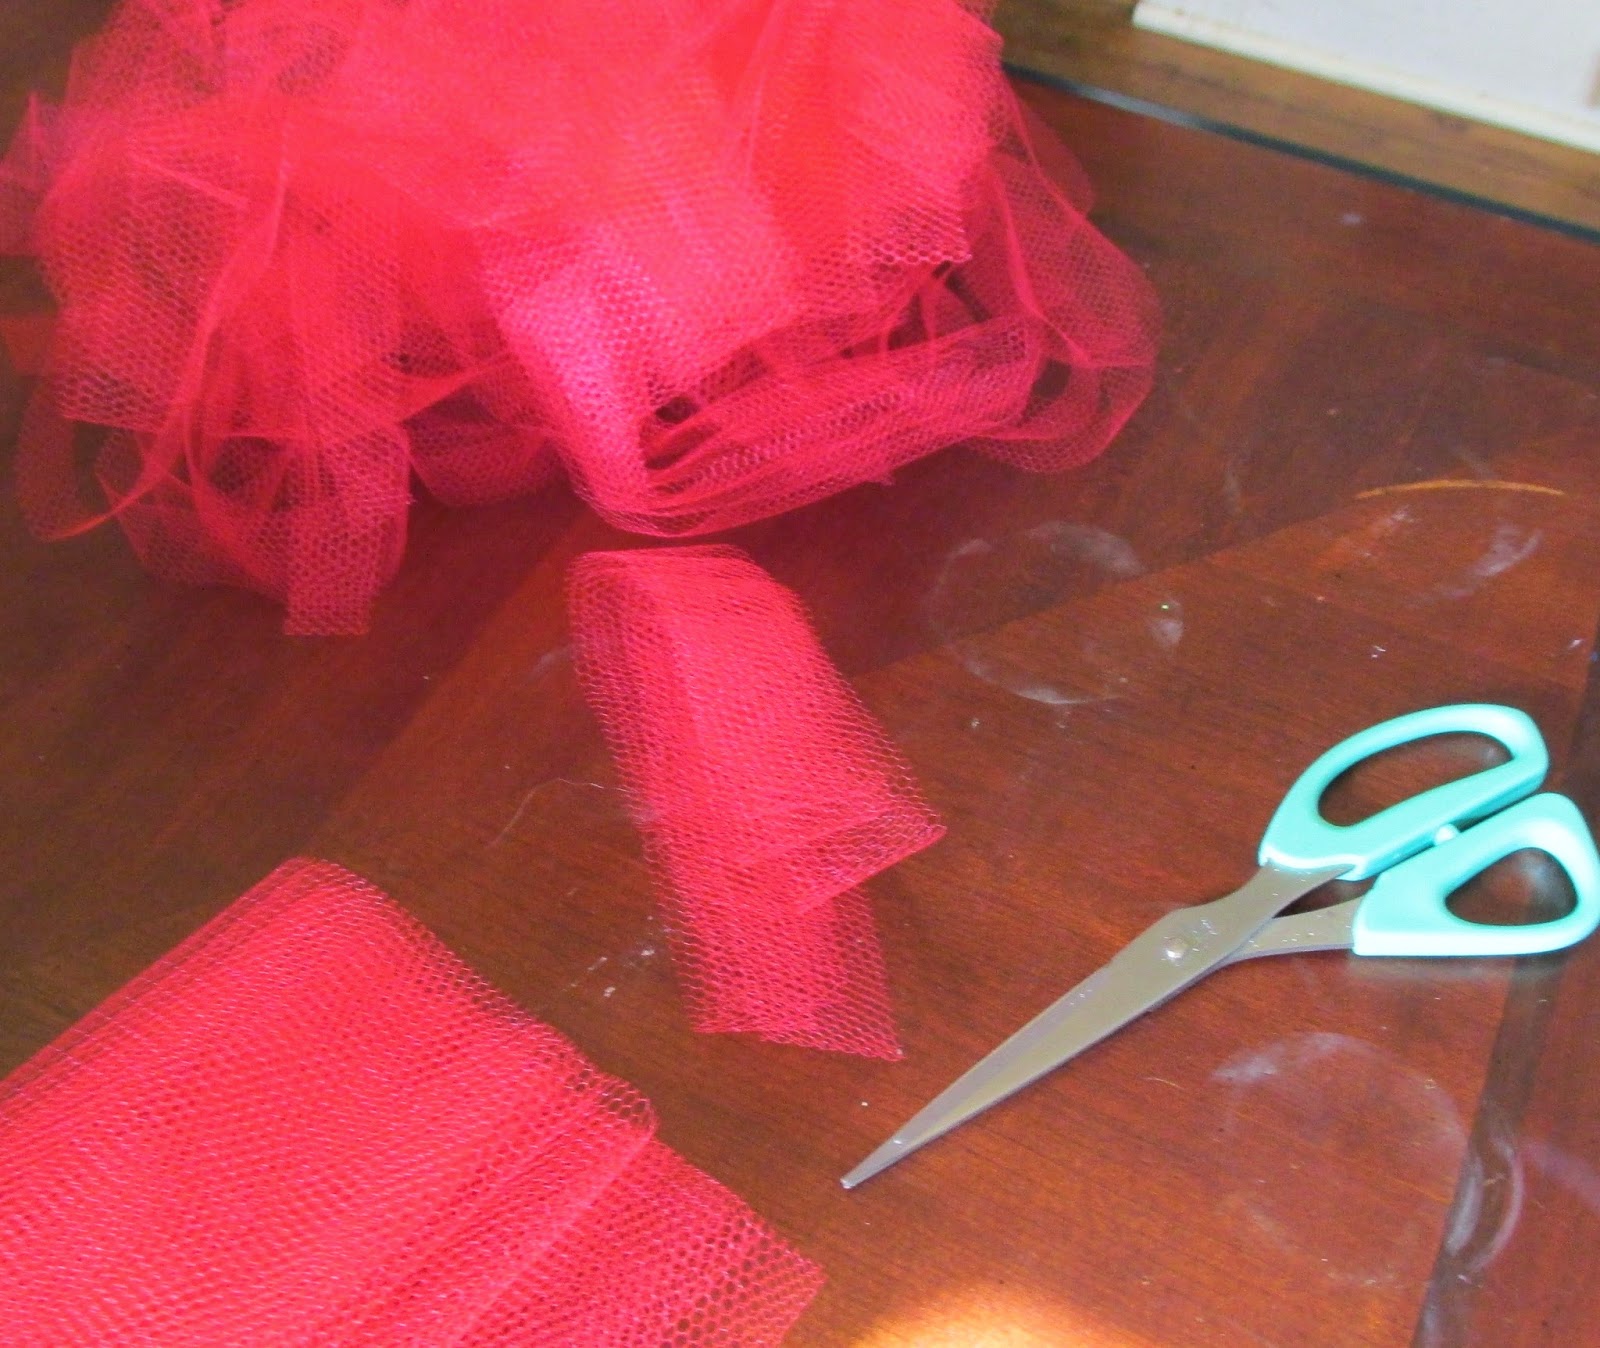
Coarse Nylon Netting, cut in 1 inch strips
Scissors
Needle
A Pattern, I chose this one from Planet June  ( I have used a Heart shape many times, but recently discovered this pattern, I truly Love it. Much better shape, and easier construction than my original..)

Using Junes Pattern for the Large Heart, with 3 strands of cotton and the N hook, construct your foundation, exactly according to pattern for round 1.
For round 2, I want you to follow the pattern, with a slight modification of the multiple stitches into one. For those, I want you to place the last stitch of the group in the post of the stitch, thus spreading your placement just a smidge. This will provide a better base for your netting layer. (See the pictures for further explanation)
See the V there, one string is red, the other is yellow, your final stitch of the group will be placed there, to allow a bit more movement in your yarn. 3 strands can get bulky, even with a large hook. By spreading the Love, your Heart will be in better shape.
This is how the stitch looks after you have placed the final stitch in it. Kind of cool the way it is all secured there.
The third round is made exactly according to June's pattern. Isn't this great, the shape is so perfect, It goes together so quickly. Oh, for the tip of the point, place those stitches the way I had you do for round 2. (All of them)

Now for the closing, I went a bit nuts with the pictures, but it makes a difference in the finished look, as well as how your ends will be dealt with.  After you make the last stitch of round 3, remove the hook, turn the heart over, and follow these simple steps.
Insert hook through fabric, in the next stitch

Grab working loop, and pull it through to the back of your work.

Yarn over and pull it through to seal the slip stitch

Pull the yarn through, far enough that you have ends to work with,
about 3 inches is good. Cut in the center of the loop.

Using each end individually, secure this, tugging each one, but not pulling so tight as to snap your yarn.
Just a little more to do before we add our netting.  it matters, hang in there.
Using your H hook now, Use loops along the back or your Heart to secure the ends you just cut
Insert hook under loop, grab yarn tail and draw it down

Repeat this with another place that seems logical to you, the goal is to bring this tail
to the end from your starting ends at the center of the heart.

Once the tails are close enough, tie each color together once,
like the first step in tying your shoelaces. don't form a knot,  secure each of the three yarns this way, then grab a needle to bury each of the six ends, going out from the center, in different directions.

Whooo Hooo, Heart is done, and for the first one, it took longer than you thought, simply because you were going back and forth between June's instructions and mine. The next one will take about half the time, because it really is simple once you have done it!

Lets look at our heart now, to determine which side to place our netting. This piece is crochet in the round, with no turns, so there is a designated right side, and wrong side.  The netting will go on the wrong side, because of the loops that naturally form there. So, for all you rebels out there, this is a time when the wrong side is the right side!  Feel better now?  I Do,  I tend to be somewhat rebellious. It is fun, keeps people wondering.
Okay, Here we go with a ton of pictures.  If you don't like it, feel free to amble off into your own experience. Just because I lay out guidelines here, it is not mandatory for you to follow them. If it were, you would not be looking at this, as I would not have been able to do it!
Just take a gander at all these loops we have to work with.  to keep your netting from ripping, and the heart from getting really sloppy, I encourage a minimum of 2 strands of yarn for each stitch base.

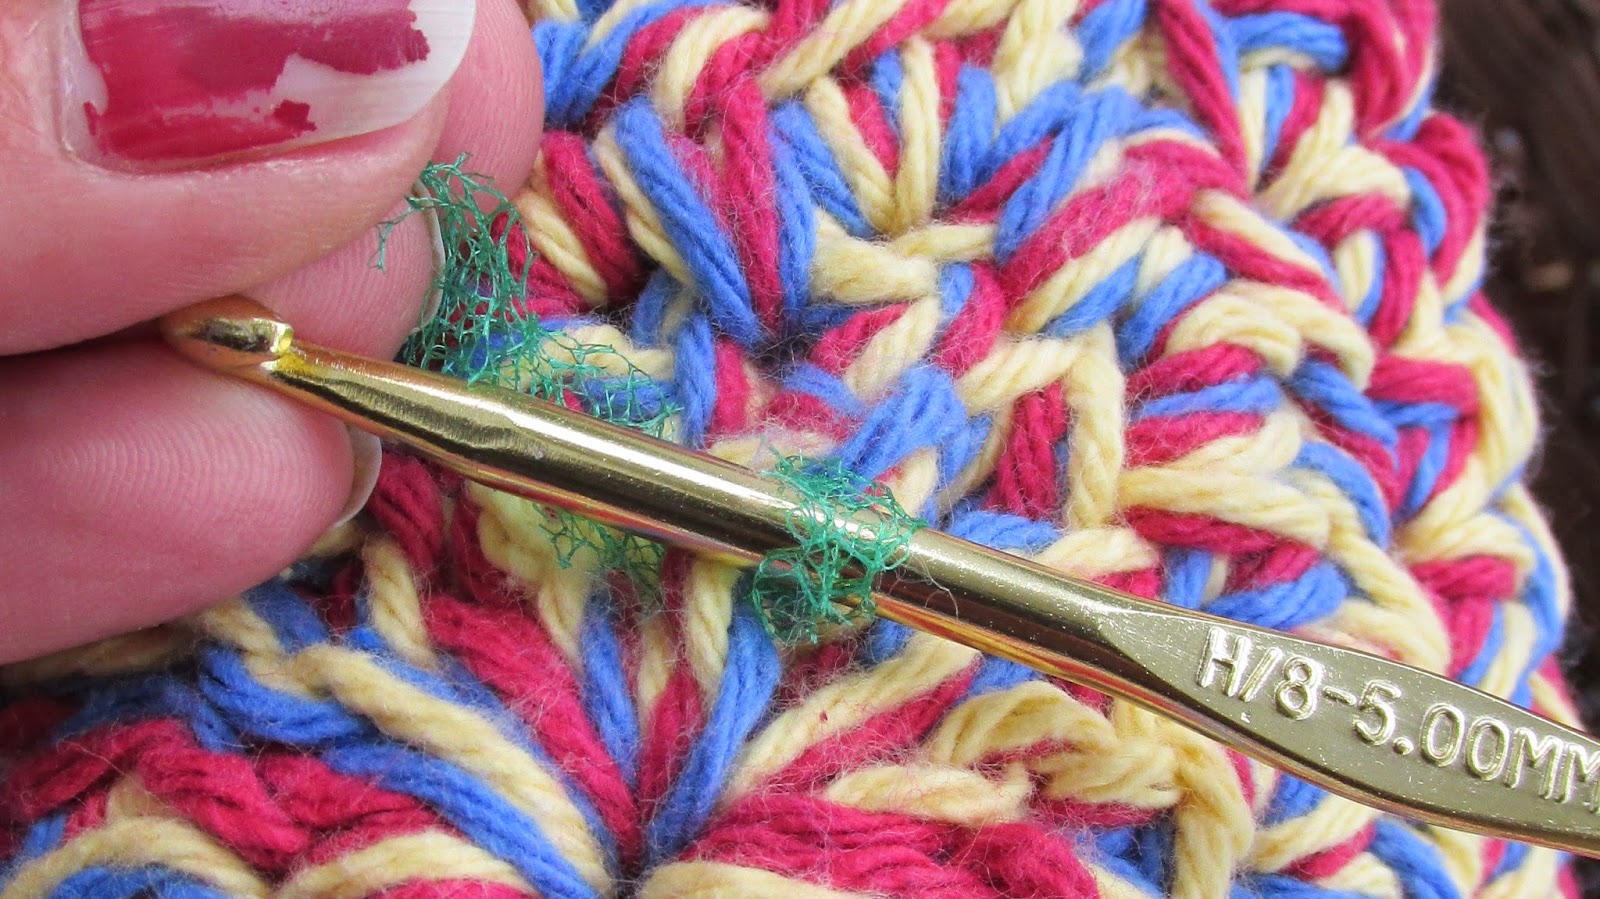
Starting in the center of the heart, you will see the stitches have 3 legs, the first in the center hole, the second, and then the top, where the next round is worked. I like to use the second leg, or bump if you will. insert hook under it, just on the surface, not all the way through your fabric. pull netting through to form a working loop.  Ch 1 to secure it. Keep the netting somewhat loose here, so as not to break it. The hook should slide pretty freely inside the working loop

Insert hook under next stitch loop, draw netting through, and sc, ch 1, and repeat. working around the center, under the second bump of the stitch

As I said, try to be sure you have two strands of yarn that you attach the netting to prevent a fragile scrubbie. 

When you have the first round done, it is sort of heart shaped, but not likely to be perfect.
You can cut your netting, or work in a spiral, out from the center.

Where the rounds meat, there are an abundance of loops to choose from, it does not matter,
as long as you remain consistent in your choice, and put the ch 1 between each sc.
this allows more abrasive quality, and prevent the netting from being too tight.
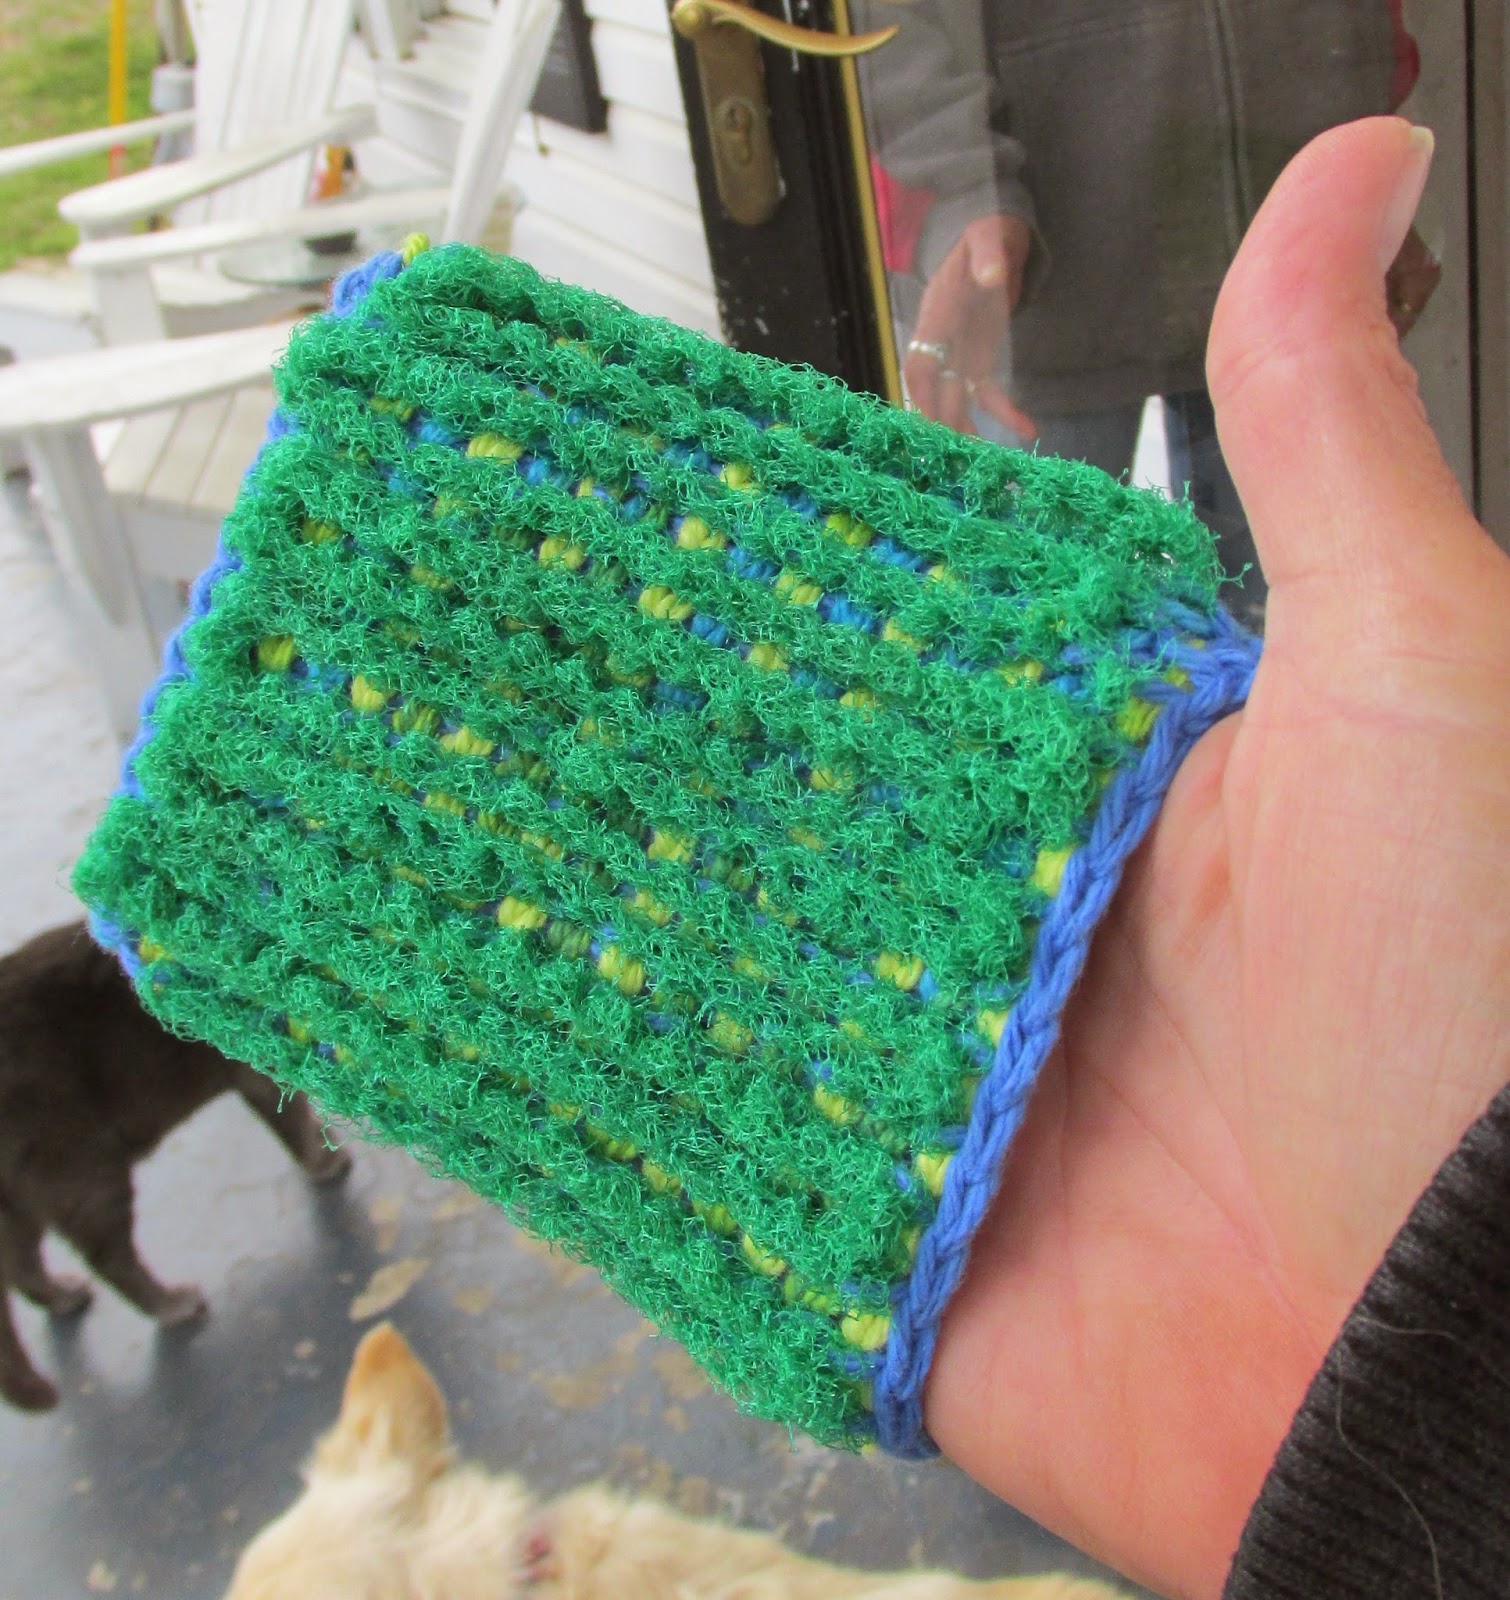
I chose to spiral my netting, I am not sure I like it, but I do Love the colorfulness of this sample.
I did it so I could better show details in pictures.
My Grandchildren have all shown me that hearts
do not have to be red, pink and white anymore.
if there is a color you like, by all means, go for it

And this is the washcloth side of the finished item.
perfect for the counter, tabletop, or where ever you need
a clean wipe down, with out any abrasive roughness.


Now, The Legal stuff.  This is my creation. I used someone elses pattern, is it mine? Yes, and NO!  June from Planet June designed the Heart.  I linked to her pattern, with her permission.  In the descriptions of the changes I made, I did not reveal her pattern on my blog post.  I am taking credit for the SCRUBBIE, and giving credit to the designer of the original pattern.

This can be done with any motif by the way. It could be a flower, a bow tie, almost anything out there. I chose this one for it's superior quality.
Special Thanks to June for the pattern, and her gracious permission to use her work in this way.

I guess I best say. DO NOT PUT THIS IN THE DRYER it will melt!  you can send it through the dishwasher, if the heat dry is turned off.
If you want to add a hang cord to allow it to air dry, simply chain 30 with a single strand of cotton yarn, slst to form a loop.  cut your yarn and hide your ends. slip the loop through the fabric, pull the rest of the loop through that. There ya go, licket split. good to go!

Until Next time
Becky


Wednesday, April 23, 2014

Scour Mitt. Free Scrubbie Mitt Pattern

Hand Mitt Scrubbie
By Grammy Dirlam
First Published on April 23, 2014, All rights Reserved


This is the version that received the most likes on my Facebook Page Monday and Tuesday.  If you can call SEVEN the most.  I am at a Loss on how to engage with people on facebook, if they never see my posts.  Regardless, I am true to my word, and will follow through.  If any of you have tips and tricks on improving engagement, without paying to boost                                                         posts, leave me a comment, please.

A Special Note about this pattern, it is small, about 8 inches in circumference. If you make it fit comfortably, as soon as it is wet, it will not stay on your hand.  I did not ooops, or design this for a 10 year old. It will fit snugly dry, and stretch as soon as it gets wet.


This pattern is worked with the Tunisian Simple Stitch, and can be worked in a flat piece, stitched together, or it can be worked in a round, with a double ended hook.

I'll provide instructions for the flat version here, but I must say, I am not a Tunisian Expert, If you find my instructions confusing, Please visit Kim Guzman's YouTube Page, for a more comprehensive explanation. You will want to watch the Tunisian Foundation , and the Tunisian Simple Stitch, which follows it

To Create the Flat Panel Scrubbie, Using a single color of Cotton Yarn, you will need about 1/2 of a skein of Sugar and Creme 100% Cotton,
an I crochet hook, and an I Tunisian Hook.
Scissors and a needle are also required.
About 1/3 yd Nylon Netting, cut into one inch strips (this is available in most fabric stores. Get the coarse stuff, the fine is great for facials, but is not going to give you the abrasive qualities you deserve in the kitchen.

1) Chain 26 with the regular hook, set regular hook aside, and insert the Tunisian hook. Using your hook in each ch, draw a loop onto your hook, at the end of this pass, you will have 26 loops on your hook.
Reverse Pass, Yarn over, pull through 1 loop on your hook, then yarn over, and pull through 2 loops on hook. Continue yarn over and pull through 2 loops until only 1 loop remains on your hook.
2) Working under the front vertical bars, yarn over and draw up a loop on the hook across the row, at the end of this pass you will have 26 loops on your hook.
Repeat Reverse Pass as for row 1.
Repeat forward and reverse pass 16 more times.
Using regular crochet hook, working under front vertical bar Yarn over, and rather than holding loops on the hook, slst each st to finish off this portion of your Scrubbie
Leaving a long tail, cut the yarn,

 for the abrasive portion I recommend Nylon Mesh, found in the fabric department. I bought mine at Walmart, it was .97 a yarn, and comes in many colors   I folded my piece, and cut it into strips about an inch wide. I tied them together with a simple knot, and pulled it snug, being careful to not tear the mesh. Once it is rolled into a ball, you are good to go.
Using an I size crochet hook, we are going to use the front vertical posts as a base for the mesh, in sc.  We end up with wonderful straight lines, and an amazing functional look to our scrubbies.. Let's make awesome magic.


 Insert hook under post, only the post, no need to go through the fabric, Fold about an inch of the netting over your hook and pull through. Create a sc on the post, insert hook under the next post, tuck tail from mesh so you will be crocheting over it, continue in this line placing 1 sc on each vertical post. Don't pull the netting to snug, as it will snap, but once it is adhered, it holds up really well.
At the end of the row, ch 1, sc into the post in the next row. turn so it is easy to work in the stitches.


 When You have 1/2 the mit covered in scrubbie stripes, cut mesh netting, fold it in half and slip stitch closed over top and 1 side, leaving one short end open for your hand.  If you want a hanging loop, chain 20, Slst in last st made to close. Cut yarn and bury end.

There you go, all prim proper and pretty. Ready for Spring Cleaning! Maybe for the fresh Vegies from the Farmers Market?

You may sell your finished items, with credit given to Grammy's Creations as the designer. You may share the Link to this post with any Social Media site, or in private electronic communications. Do not copy and paste this pattern to any site, do not print this pattern for private sale. do not claim my work as your own.


Tuesday, April 15, 2014

All 4's are not created equally

I have been working on a pattern. I was so excited to get results from testers before I released it. Even though it is intended as a free pattern for my blog, I am really becoming more determined to be sure the patterns work before I release them.
I specified the yarn, the hook size and even explained my crochet style as that of a lifter. I offered my gauge, and laid out the instructions to create the item.  the results from the tester were so far off, Even though all the instructions were followed. I scratched my head, and grabbed more yarn.  My results were different yet.  I tossed the whole project in the corner.  I have 18 ideas battling my brain cells for attention. I have a multitude of undone chores around my house, and a 5 year old who wants my attention.  Can you believe it, I cannot let this go.

I pulled the original out of the heap of "I should frog its" and began to look at it again. Had I missed a step when I wrote it?  I pulled the second one out.  I am wearing my glasses to count stitches, I am also noticing that the yarns feel really different. But they are both the same brand.  I dug out ends, and began to look at them. The color was a definite difference, but the textures  are off.


Where is my pencil and ruler?  Wrapping the yarn around the pencil, (My granddaughter is all shades of eager, She wants me to do this with all her pencils for school now, so she will be able to see hers easier.)
One is just over 13 WPI, one nearly 15.  That is odd. Neither of those falls in with WW yarn counts that I am aware of.

Off to do a google search. Perhaps I am measuring the wpi wrong. I have learned that so many of the things I learned as a kid are not done that way anymore.  Sort of like math.  I watched 3 dif videos, and read a couple blog posts. Naw, that isn't it.  CGOA yarn standards is the next stop. Great info, but not what I want.

  Craftsy? Well, If it is there, I didn't find it,but instead had to close the window after I spent 20 minutes staring lustfully at every sort of yarn imaginable. I wanted to share pictures, but which one, and too far off target.   Ravelry?   This is better, but it did not give me the results that I got from wrapping the pencil!


With all the variables within one brand of yarn, how can we say gauge does not matter?


Let's just say that it really does come down to getting the right number of stitches in the right amount of space. Even though steps are being taken to standardize the industry, the market for yarns has exploded, and there is no rhyme or reason to what I find, all with a silly 4 on the label. Even within Red Heart Super Saver, I got several different WPI measurements.

I will be sending the pattern to another tester tomorrow.  I Will modify the pattern if her results are different as well. It is too nice to just frog.  

Monday, April 14, 2014

As children, we are taught to share!

It is true, It is good to share.  Each of us feels good doing it.
Were we taught to share other peoples things?  I was not.
I was also not taught to expect everyone to share their special things.
Like the candy store, With the exception of a little baggy on Halloween, or a candy cane at Christmas, they didn't share. I had to buy what I wanted.
The kids on the corner shared their toys, but I had to leave them when I went home. I did not get to keep the things that were theirs.
If a classmate brought an item to school for "show and tell", it was their right to show it off, and tell the class about it.  If I had tried to do it for them, I would have made both the teacher, and my classmate mad.

Why is it any different with a crochet pattern?  I put pattens on my blog, to share with the people who visit here. I do not mind if you tell your friend about it, and where they can find it, but to take it to them is not okay.  You can post the link to my blog in a crochet group, and tell people in that group that I posted a pattern for a new scarf today.  It would looks something like this

Hey Everyone, Becky at Grammy's Creations posted a new FREE pattern today for a scarf. It is cool, go look   http://grammydirlam1.blogspot.com/2014/03/skinny-swanky-scarf-product-review-and.html

Generally, when you do that, a picture pops up too.  That is cool. It draws people here, to my page. It allows me to play Show and Tell.  It allows me to get credit for the page view. It allows me to get paid by the advertisers for their visit.

When I or anyone else says please share, we mean the link, NOT the pattern itself. Another Blogger posted this poem today, and I just LOVE it.  I wanted to share with each of you as well.  It is called Crocheting Blues from Crochet Memories.  I would like it if you took just a minute today to give it a read, and a couple minutes to give it some thought!

See How I did that?  I did not take credit for it, I did not give it to you, I gave you the info so you can find it, because it is worth Sharing!  Now I feel good, and I did not violate any rules. (implied, or written)

Until Next time
Becky

Sunday, April 13, 2014

This has Ended A special offer, Limited time Only (12AM EDT) This has ended

This Giveaway has ended

Hey, Just because I want to, and I can because they are mine,

If you comment here with your ravelry name, or send me a private message on my Face Book page, I will give you one free copy of any one of my paid patterns from my ravelry shop.  You Choose!

Why you ask?  Because I want to increase awareness, and I cannot think of another way

Visit my Ravelry shop!


This giveaway has ended
There are several to choose from
This offer Ends at 11:59 pm EDT Sunday, April 13, 2014.
Patterns will be delivered Monday April 14, If I have not already delivered them. I am pooped, and going to bed. Blessed Dreams all of you lovelies!


Thank You the give away has ended.

Saturday, April 12, 2014

A Free Easter Hat from , graph hat pattern review

This pattern from Manda Nicole crossed my vision a couple weeks ago, and I just had to take pause.
Easter Graph Hat
 I was so strongly drawn to the symbols used.  It seemed so special to me, Something for the Easter Season that had nothing to do with fertility and rebirth, and yet, it did.


A Christian faith is all about the rebirth. The forgiveness of Sin and rebirth for the truly repentant man, Through the sacrifice of our Lord, Jesus Christ.

I do not intend to stand on the pulpit here, so please do not run off, but I also do not want to just say Nice Hat, and move on. These symbols represent each step of the grueling task Christ took on, because his father wanted to offer man a way out of their trap.


You can find the story in any of the first four books of the New Testament, Matthew, Mark, Luke or John.  My favorite is Luke, somehow, the writings there always felt easier to grasp.


This is an easy enough pattern to follow, If you are a graph person, it is there, If you prefer the written pattern, she has written each round out.  She has provided color pictures to get the graphic to show well. It is a really Nice pattern, and an amazing way to honor the season.  Written for the entire family, from baby size all the way to adult.

When I chatted with the designer about writing this article, I asked about her feeling on my adding a floppy brim to this hat, for a little girl, I was thinking about my granddaughters spring Sun Hat.  She actually loved the idea.  My granddaughter on the other hand wanted me to change it, and put in flowers.  This was not the concept at hand, and so I moved away from the idea.

It would be simple enough to do, You would want to be sure to start the graph pattern one round sooner than the instructions say, and instead of using the round of fpsc at the bottom of the pattern, follow the instructions for the brim I offered on this pattern.  It would also work well to use a cotton yarn, for a more stable appearance with breathability for the warmth.

It is my hope that you discover joy this Easter Season. The Love of the Lord is beyond words, and yet not everyone is in the right place to accept it. No judgments here, it is not my place.

Until next time

Becky


Sunday, April 6, 2014

Crochet for Cancer CAL with Red Heart Prize Package


Hi Everybody;

Have you ever participated in a crochet-a-long for charity? I have not, and was so excited to get on board for this! 

Over the next two weeks, we are asking everyone to make four projects to mail to a chapter of Crochet for Cancer, Hooks of Hope, located in Eastern Pennsylvania. We have 9 bloggers promoting this, and  have compiled all of our best hat patterns for you to choose from to make your projects. Anyone can participate, You only need to make the hats, and mail them in to the address below. The CAL runs from now, until 4/21/2014. The person's whose packaged is first received by Hooks for Hope After 4/21,  wins a prize package from Red Heart Yarn, worth $125!!  This has been changed!!!!!  
All packages containing 4 items, postmarked from 4/14 to 4/28, 2014 will be entered into a drawing
If you need a pattern, here are the patterns from the bloggers participating below. If not, make your own!
The Crochet-A-Long is open worldwide, but the contest is better suited to residents of the US and Canada, although anyone is welcome to mail a package to Hooks of Hope. Contest rules:
1. Complete the challenge by making at least 4 projects (or two large projects, like a blanket or shawl)
2. Mail your package to Hooks of Hope (address above)
3. Make sure your package is postmarked on or before April 28, 2014
4. All packages with that postmark will be entered into a raffle three weeks after April 28 on May 19 (to give time for all the packages to come in the mail). 
5. The first package drawn will receive the grand prize from Red Heart. The 2nd through 5th packages will received handmade plarn bags with yarn goodies inside from Hooks of Hope!

Here are the bloggers participating! Thank you!

My Merry Messy Life

Beatrice Ryan Designs

I'm Hooked

Curious Tiff Crochet

KT and the Squid

Elk Studio

Grammy Dirlam

Moogly

Please Read the Requirements for Your Donation, per the Crochet for Cancer website:

  • Must be new – never worn
  • Clean – free of perfume, pet hair and smoke
  • Placed individually in clear ziplock style plastic bags
  • Soft yarn is best- cotton, acrylic, silk, fleece or a blend is best. Do not use wool or alpaca as they can irritate the scalp.
  • We accept baby, children, youth, and adult hats.
  • Please use patterns that do not have gaps or large holes. A tighter stitch is best so that it covers the scalp.
  • Be sure to wash your hands on a regular basis while making the caps.

They also accept other items, which are fine if you want to use these instead for the CAL.

  • Scarves
  • Blankets (all sizes)
  • Prayer Shawls
  • Be creative, we accept any type of gift item to give to a person fighting cancer. For example, a crochet pink ribbon pin to support breast cancer awareness.
  • Yarn, Yarn, Yarn!!!
  • We accept gift cards to purchase yarn and supplies from the following locations: Hobby Lobby, Michael’s, AC Moore Crafts, Wal-Mart, and JoAnn Fabric.

Please Mail Your Package to:

Hooks of Hope c/o Melissa Wortmann P.O. Box 163 Neffs, PA 18065  To Qualify for the prize, your package cannot be postmarked before April 14, 2014.


International Readers

We would still love for you to participate by donating your projects to your local hospitals or charities. Let us know what you're up to by sharing on my Facebook Page, Google Plus.

The Fabulous Prize - $125 Worth of Yarn From Red Heart!

Here is the prize that Red Heart Yarn has graciously provided to participate in our event! Get your projects ready to ship. All packages postmarked between 4/14 and 28, will be entered into the drawing for this fabulous prize!
So, share the projects you've completed and are sending in on any of my social media and comment with what you'll be making below! Use the hashtag #CrochetForCancerCAL so we can follow each other!


I have an additional pattern that I will gift through Ravelry to the first two participants who wish to make it for this project. Kim's Prayer Shawl. Please comment below if you want to make the Prayer Shawl.

Shades of Spring-Textured Sun Hat Pattern

Happy Spring!

About 4 years ago, I got a wild hair, and decided to make a Sun Hat for my Granddaughter. I create a new one for her every year now, and pass the last off to her 1/2 sister. This year, I put the pattern together, to share with all of you. As with all my patterns, Please share links. Feel free to sell the items you make from the pattern.  Do not sell my patterns, or share them on auction sites such as Listia.

I made one with Peaches and Cream Cotton, and have started one with Caron Simply Soft.  Both have really nice qualities, and work well.  The Simply soft will do very nicely in the cooler climates, where it is sunny, but not really warm yet.

I have also given instructions for a smaller Toddles size as well as the 20 to 22 inch Adult size.


The pattern is available HERE in my Ravelry Store
I want to see pics Please share with me on my facebook page

Until next time
Grammy