As we move from the warm weather, into the colder months here in the United States, I am once again torn. I love crochet, and the need of warm garments encourages people to pull out their hooks. But I hate the cold. If I could create a moderate year round climate, I surely would.
We need Hats for our children. to keep their body heat in, helping them stay healthy, and happy. If we can make them unique, it is all the better.
This pattern is moderately easy. Listed as Intermediate, because of the Post Stitches, It is entirely doable in a couple of hours, for most crocheters comfortable with FP stitches.
TO make this hat, you will need:
 1: With color A; Ch 4, 15 dc in 4th ch from hook. (16 dc)
 7: With A; Ch 3,* FPtr on next dc, (in row below) dc in next sc, FPtr on the next dc( in row below), dc in sc (above the FPtr of the row below) Repeat from * around to last st, FPtr on last dc (in row below) (64 st) Increases completed at this point. Circle should measure 5 1/2 inches, (6 inches, 6 1/2 inches) and be slightly domed.


We need Hats for our children. to keep their body heat in, helping them stay healthy, and happy. If we can make them unique, it is all the better.
This pattern is moderately easy. Listed as Intermediate, because of the Post Stitches, It is entirely doable in a couple of hours, for most crocheters comfortable with FP stitches.
TO make this hat, you will need:
Worsted Weight Yarn.
Baby Blue, color A
Off White, color B
H (5.0MM) Hook for Child size I (5.5MM) Hook for Teen Size J (6.0MM) Hook for Adult Size
Notes:
- Each round is joined with a sl st in the back loop of the first st of the round.
- Each color change is worked in the sl st of the previous round. ( Insert hook into back loop of first st of round, drop working color, pick up new color, pull through to continue to next round)
- Do not cut colors until directed to do so. Saves time, and ensures hat will not come apart in the wash.
 1: With color A; Ch 4, 15 dc in 4th ch from hook. (16 dc)
2: With color B; Do not ch, sc in both loops of each st. around
3: With Color A; Ch 3(for dc) FPtr on dc in the row below the same st.. *dc in next sc, FPtr on the dc in the row below the same st. Repeat around. (32 st)
4: Repeat row 2, (32 sc)
5: With color A; ch 3, FPtr on dc one row below. *dc in next 2 sc, FPtr on next dc, one row below. (between FPtr of row 3) Repeat around to last st, dc in last stitch (48 st)
6: Repeat row 2, (48 sc)
 7: With A; Ch 3,* FPtr on next dc, (in row below) dc in next sc, FPtr on the next dc( in row below), dc in sc (above the FPtr of the row below) Repeat from * around to last st, FPtr on last dc (in row below) (64 st) Increases completed at this point. Circle should measure 5 1/2 inches, (6 inches, 6 1/2 inches) and be slightly domed.
8: repeat row 2, (64 st) All rounds will now be 64 st.
9: With A; Ch 1 (not a st) *FPtr over dc 1 row below,
dc in sc above next FPtr. Repeat around
10. Repeat row 2
11. With A; ch 3, *FPtr on next dc (1 row below) dc in sc above next FPtr. Repeat around
12. Repeat row 2
Repeat rows 9 to 12, until hat is 7 1/2 inches from crown to base. ending on round 9 or 11. cut color A, bury end
Finishing, With color B; work 5 rows of 1 sc in each st around. do not join rounds, rather work in a spiral fashion. cut color B, bury all ends

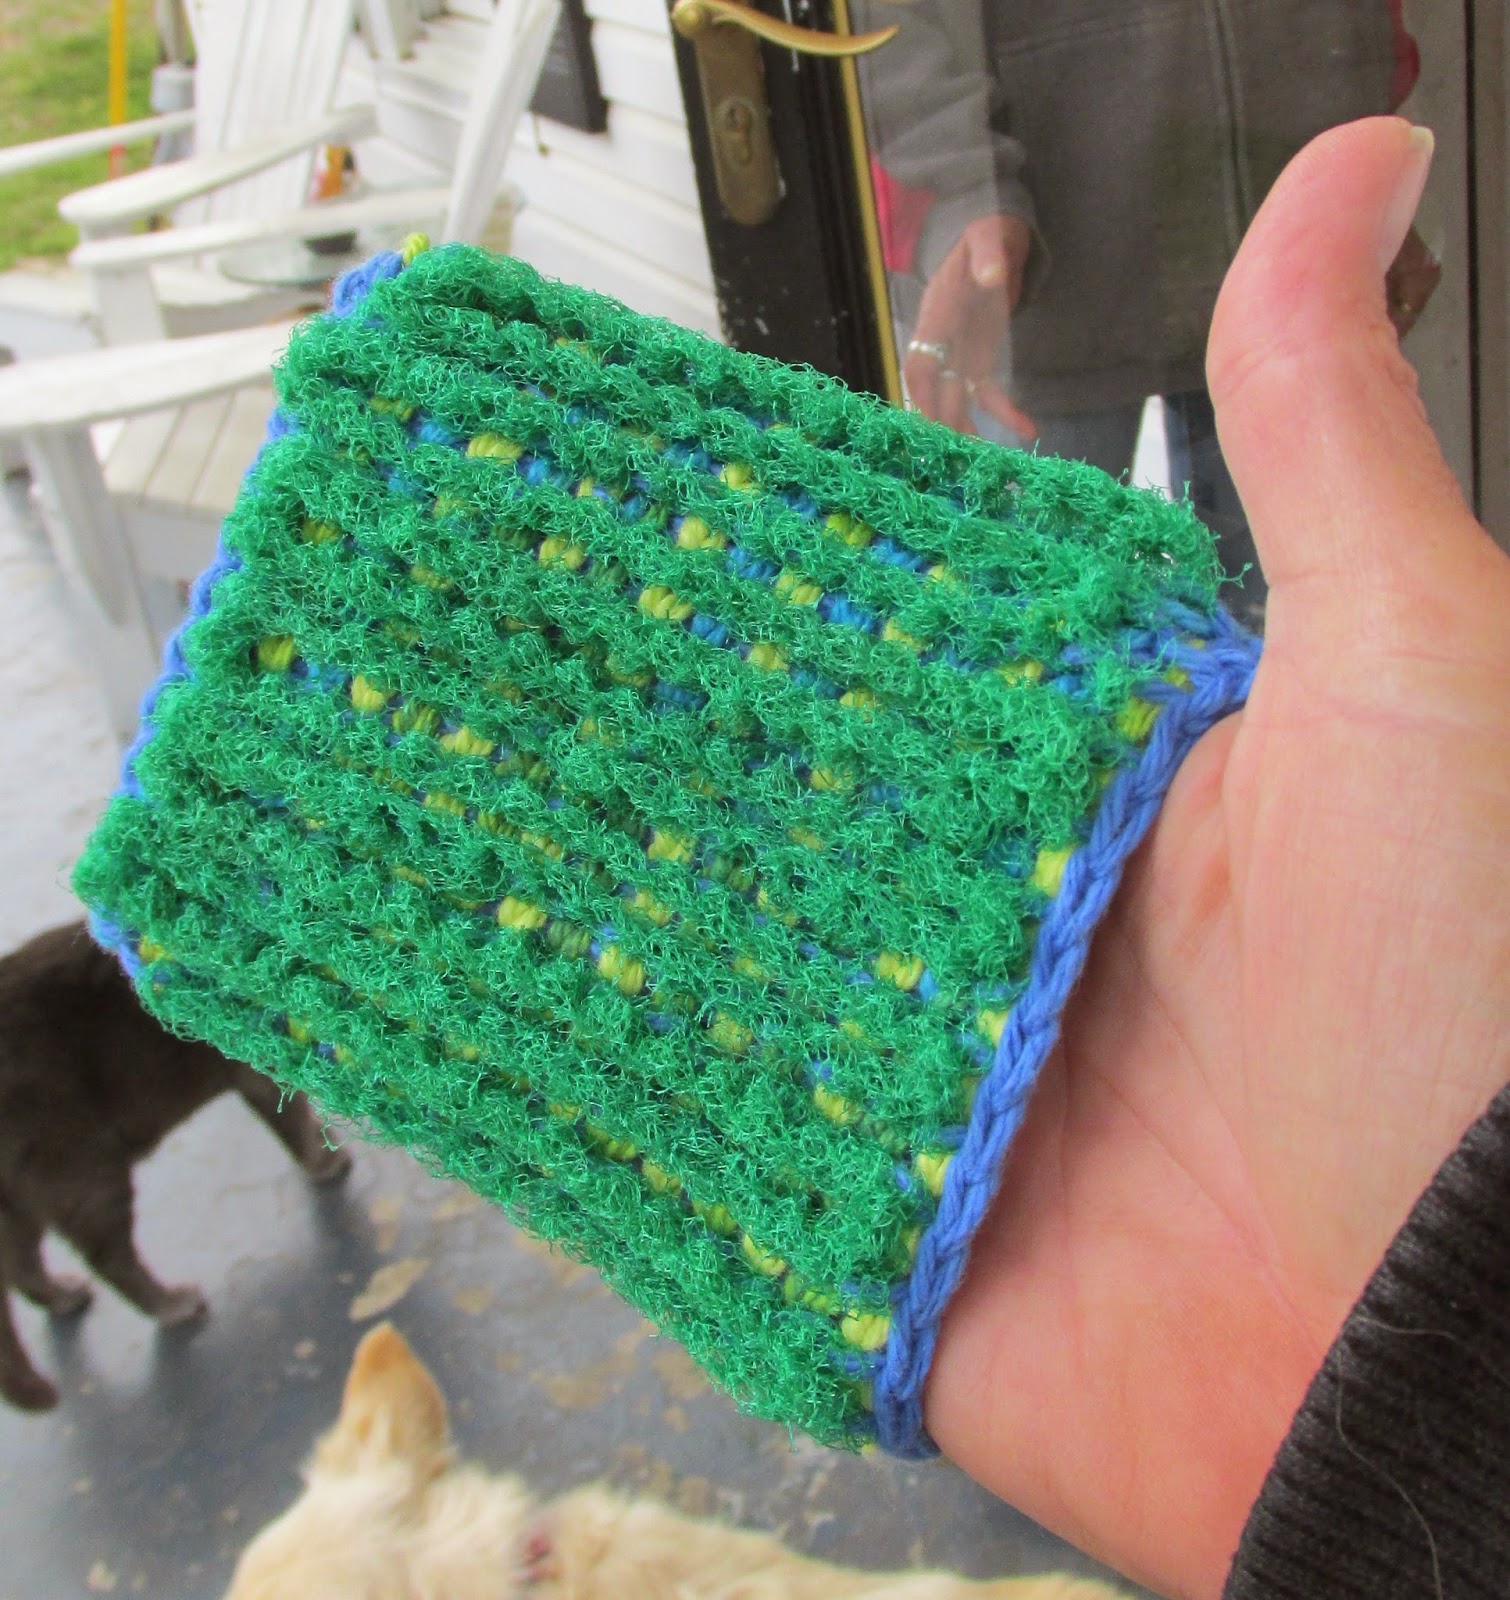
Here is a close up of the fabric. See how the white rides behind the ribbed stitches, amplifying the 3D effect? Try this with any color combo, Maybe a Soft Blue, and a Black for the even rounds? Or Pink and Grey? Maybe an Orange and Green? the colors are so endless. Just be sure to check your gauge (I gave the measurement at the end of the increase rounds.) Not all #4 yarns will give you the same gauge. You will need to check yours to be sure the final hat will be appropriate sized.
One additional tip, Please take the time to weave in the end at the crown of your hat, rather than crocheting over it.
I had several hats donated for a charity drive recently. I had to wash them, to reduce possible allergic reactions. In a 2 minute wash, on the gentle cycle, I lost 7 of the 12 hats because the crown came apart. It could have been avoided if the end had been weaved in properly.


